Component SDK → Start Development
Start developing your project by writing the needed code and editing the needed files. You will be able to see the effect of your code changes directly on Incorta. Here are the steps to develop your project:
- Sign in to the Incorta Cloud Admin Portal.
- Connect a cluster.
- Select Incorta Analytics.
- In the Navigation bar, select Content , and then + New.
- In the Action bar, select + New → Add Dashboard.
- Enter a dashboard name, and then select Add.
- Select + Add Insight.
- From the Insight Panel, select Developer Component.
The Developer Component automatically connects to your locally installed Component SDK.
- Start implementing your project by editing the definition.json file, in which you determine the number of trays, the pill settings, and the component settings.
- Proceed with editing or creating all needed .tsx files in the src folder.
- Add any images or resources you might use to the assets folder.
Changes in your code directly affect the output in the Developer Component. In other words, the Developer Component will behave like a simulator to your code.
Project folder structure
This section describes how a project structure appears in your code editor. Each folder and file is designated to serve a purpose while developing your custom component.
The following image shows an example of a project folder structure:
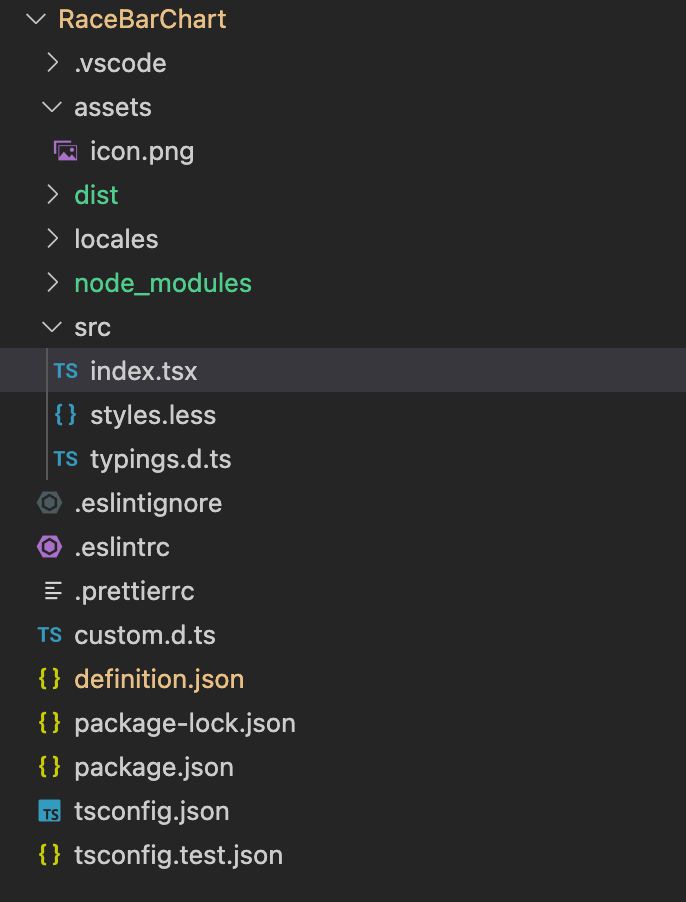
As a React developer, you must have experience in managing the tree components. The following table describes the uses of the following files or folders in a custom project.
| File/Folder | Description |
|---|---|
| assets | The folder where you put all images and icons that you are going to use |
| dist | The folder where all package .inc files are stored |
| locales | The settings file where you manage properties of displayed names, such as language |
| node_modules | The folder where React libraries are installed |
| package.json | The file that contains all settings and configurations of your project |
| src | The folder where all development and style files are stored |
| index.tsx | The main development file |
| style.less | The file that will contain the styles of your component |
| definition.json | The file that will contain all component and pill settings that you will define. For more information about the available predefined settings, refer to Definition.json |
Build and package your project
As you develop and test your component in the Incorta Analyzer, you may wish to add it to your list of external components either to test it on dashboards or to publish it for consumption by other users. To do this, you’ll need to package and upload your component into the External Components.
- Ensure that your component works in the Analyzer using the local development server.
- Check the version number for your component in the
package.jsonfile. - In the terminal, run the following command to create an installable package:
create-incorta-component package. The package (with a.incfile extension) will be saved in thedistfolder with the version number embedded in the name.
Make your component available to others
After creating an installable package of your component, you can make it available to your tenant users or other Incorta customers via the Component Marketplace.
Publish your component internally
To make your component available to your tenant users, follow these steps:
- Sign in to Incorta using an administrator account.
- Select Content, and then open any dashboard in edit mode.
- On the Add Insight tab, under External Components, select Add Component.
- In the Components dialog, select Upload.
- In the Add Component dialog, drag the component’s
.incpackage or select Click or drag file to this area to upload to locate it.
Publish your components to the Marketplace
For now, you cannot publish your components to the Marketplace by yourself. Share your component’s package with the Incorta team to upload it to the Marketplace on your behalf.
- You must provide the component name, description, sample pictures, and icon.
- The Incorta team will review your component before publishing it.
After the Incorta team adds your component to the Marketplace, it will be available to Incorta Cloud customers to install on their tenants instantly. Additionally, Incorta On-Premises customers can download it from https://marketplace.incorta.com and upload it to their tenants.